
Winter in Wisconsin is cold. It is snowy. It is windy. Your home has to fight all of that. This guide shows you how to winter-proof your house and save money with easy steps you can do today. We keep it simple. We keep it clear. And we show you why each step works.
You will learn how to seal doors, stop window drafts, protect pipes, add attic insulation, guide water away from your home, and tune your heating and humidity. We also share real facts and name the sources, like ENERGY STAR and the U.S. Department of Energy.
What “winter-proofing” means (and why it saves money)
Winter-proofing means you keep warm air in and cold air out. You also keep water away from your house. When you do this, your heater runs less. Your home feels warmer. Your bills go down.
According to ENERGY STAR, air sealing leaks and adding insulation in attics, crawl spaces, and basements can save up to 15% on heating and cooling costs (and about 11% on total energy) for many homes. That is real money and real comfort. Source: ENERGY STAR, “Sealing and Insulating.”
The U.S. Department of Energy (DOE) says raising or lowering your thermostat by 7–10°F for 8 hours a day (with a programmable or smart thermostat) can save up to 10% a year on heating and cooling. Source: U.S. DOE, Energy Saver.
We will show you small steps and bigger steps. Start with the small ones today.
Quick wins you can do today
These fixes are fast. They cost little. They help a lot.
- Add a door sweep under each exterior door.
- Replace door gaskets if they are worn.
- Add corner seals at the bottom corners of the door frame.
- Stick foam outlet gaskets behind cover plates on outside walls.
- Put clear plastic window film kits on drafty windows.
- Check downspout extensions so water flows away from the house.
- Change your furnace filter so air moves well.
These steps often cut drafts you can feel right away.

Seal doors so drafts stop at the source
Doors leak air. When air leaks, you feel cold. Then you turn up the heat. Fix the leaks first.
Add a door sweep
A door sweep is a strip that seals the gap under the door. It slides on or screws to the bottom. Pick a sweep that fits your gap.
- Standard sweeps seal gaps up to about 3/4 inch.
- If your gap is bigger, use a screw-on sweep with a thicker rubber blade.
How to do it:
- Measure the width of the door.
- Cut the sweep to fit.
- Slide it on or screw it to the bottom.
- Close the door and check the seal. It should touch the threshold but not drag.
Replace door gaskets
Look at the rubber strip around the door frame. If it is flattened, cracked, or missing, replace it.
How to do it:
- Pull the old gasket straight out.
- Cut the new one to size.
- Push the barbed edge into the groove all the way around.
- Check the latch. The door should close snug.
Add corner seals
The bottom corners are weak spots. A corner seal sticks where the vertical and bottom gaskets meet. This blocks tiny triangle gaps that often leak.
Stop window drafts the smart way
Windows lose heat. Some windows also leak air around the frame. Fix both.
Air leaks around the frame
On older windows, the air often leaks behind the trim, not just at the glass. The fix is low-expansion spray foam around the window frame inside the wall.
Steps (when you are already doing trim work or a small repair):
- Carefully remove the inside trim.
- Fill the gap between the window frame and the studs with window-safe spray foam (low expansion).
- Let it cure.
- Reinstall trim and caulk the edges.
If you cannot remove trim now, use foam weatherstrip tape on the sash to tighten the seal, or apply a window film kit as a temporary fix.
Plastic window film (quick, cheap, effective)
Window film kits use clear plastic and double-sided tape. You heat the plastic with a hair dryer to shrink it tight. This blocks air leaks and adds an extra still-air layer.
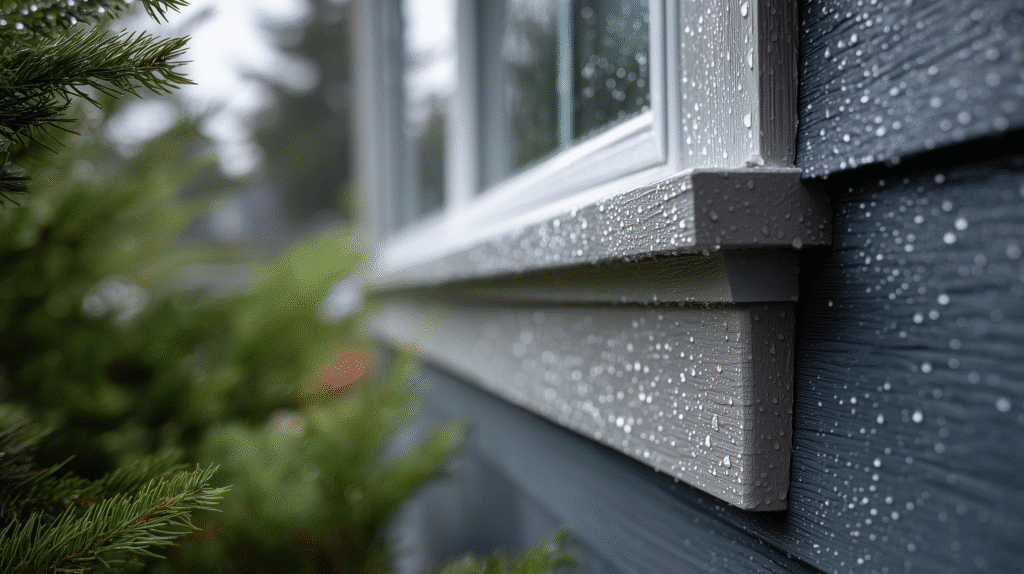
Caulk outside joints before it gets too cold
Gaps where wood meets trim or siding let water and air in. Use good exterior caulk.
- Many common caulks install best when air temps are above the low 50s °F.
- Polyurethane caulk can handle tough wet or cold conditions and the freeze-thaw cycle well.
Tips for a clean caulk line:
- Cut the tip at a 45° angle.
- Pull the gun toward you slowly.
- Keep a steady bead.
- Do not smear polyurethane with your finger; it is messy and sticky.
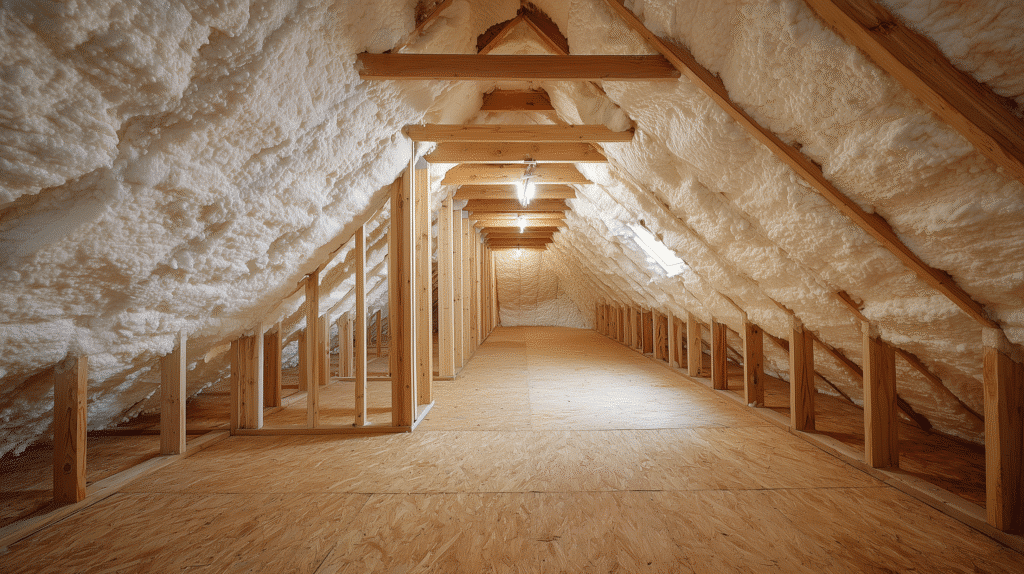
Add attic insulation (the big saver)
Heat rises. If your attic is weak, the heat escapes. That wastes money.
The U.S. Department of Energy recommends high insulation levels in cold climates—often R-49 to R-60 in attics. Source: U.S. DOE, Energy Saver, “Insulation.”
If your attic looks thin or uneven, consider blown-in insulation. Many stores rent a blower machine. You can add a fresh layer over what you have. Check depth from several spots. Over time, loose fill settles and loses R-value. Topping it up can help a lot.
Combine insulation with air sealing:
- Seal big holes first (around light fixtures, fans, plumbing vents).
- Use foam or caulk at small cracks.
- Then add insulation over the top.
Remember the ENERGY STAR estimate: air sealing + insulation can save up to 15% on heating and cooling costs. Source: ENERGY STAR.
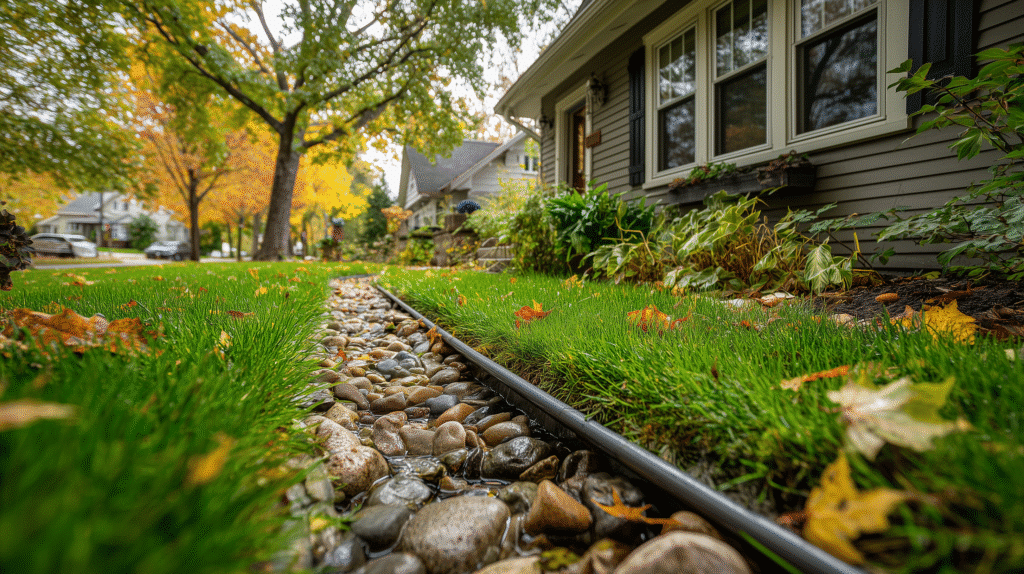
Guide water away from the house
Water near your home can lead to damp basements, ice near walks, and even ice dams on roofs.
Keep gutters and downspouts clear
- Clean leaves out of gutters.
- Make sure each downspout has a long extension.
- Aim the water at least several feet away from the foundation.
One smart trick is a buried downspout extension under rock or gravel at the end. This keeps the area neat and still moves water away.
Protect hose bibs so pipes do not burst
Outdoor faucets (hose bibs) can freeze. If they do, the pipe can split inside the wall and flood your home in spring when you turn water on again. This is common and costly. You can avoid it with one careful routine.
How a frost-free hose bib works (the simple version)
The valve that stops water is inside the warm part of the house, not at the outside handle. The pipe runs through the wall to that valve. For it to drain after you shut off the inside supply, the pipe needs a slight downward slope toward the outside.
Step-by-step winter shutoff
- Find the indoor shutoff valve that controls the hose bib line.
- Turn the valve off.
- Open the small bleeder cap at the shutoff. Catch the drips in a cup.
- Outside, open the hose bib and let it drain.
- Leave the outside handle open for winter.
If the pipe does not drain (no slope, or it sags), water can stay inside and freeze. If your shutoff valve has no bleeder, ask a plumber to add one. Also, check the slope of the faucet body. If it sits perfectly flat, a tiny puddle can stay inside the wall. Adjust the mounting so it tilts outward just a little.
Tame indoor humidity (wood, windows, and comfort)
Dry winter air makes wood shrink. Too much moisture makes windows sweat and grow mold.
The U.S. EPA suggests indoor humidity around 30% to 50% for comfort and health. In very cold weather, aim near the lower end to reduce window condensation. Source: U.S. EPA, Indoor Air.
Tips:
- Many furnaces have a humidifier tied to the duct. Switch it to “winter” mode and set a modest level.
- Use bath fans and kitchen hoods to vent moisture when you cook or shower.
- If your windows still sweat, lower humidity a bit more, and check the weatherstripping.
Make your heating system work smarter
These easy steps help your system run better.
- Replace or clean furnace filters on schedule (often every 1–3 months).
- Set up a programmable or smart thermostat. The DOE notes 7–10°F setbacks for 8 hours/day can save up to 10% per year on heating and cooling. Source: U.S. DOE, Energy Saver.
- Keep vents and radiators clear. Do not block them with furniture.
Seal small leaks you might miss
Air sneaks in through many tiny paths.
- Electrical outlet gaskets on outside walls: foam inserts sit behind the cover plate and block drafts.
- Baseboard gaps: a thin bead of paintable caulk can help.
- Attic hatches: weatherstrip the lid and add insulation to the top of it.
- Old sash locks: make sure window locks pull the sashes tight. Add sash locks if needed.
Water heater and pipes
A few small steps protect plumbing and reduce energy use.
- Set your water heater to 120°F. This is hot enough for comfort but uses less energy and reduces scald risk. Source: U.S. DOE, Energy Saver.
- Insulate hot water pipes you can reach. Foam pipe sleeves are easy to install and help hot water stay hot.
- If your home has a crawl space, check that vents and access doors close tight in winter (but maintain safe ventilation where needed).
Simple table: tasks, time, cost, and why they help
| Task | Time | Typical Cost | What It Does |
| Install door sweep | 15–30 min | Low | Seals the gap under door; cuts drafts |
| Replace door gaskets | 10–20 min | Low | Tight seal around the frame |
| Add corner seals | 5 min | Low | Blocks corner leaks at sill |
| Window film kit | 20–40 min | Low | Adds still-air layer; reduces drafts |
| Foam outlet gaskets | 10–30 min | Low | Stops wall cavity air at outlets |
| Caulk exterior gaps | 1–2 hrs | Low–Med | Blocks water and air at joints |
| Add attic insulation | Half day–1 day | Med | Cuts heat loss; big savings |
| Clean gutters, extend downspouts | 1–2 hrs | Low | Moves water away from foundation |
| Shut off and drain hose bibs | 10–20 min | Low | Prevents frozen pipes and floods |
| Change furnace filter | 5–10 min | Low | Helps airflow and comfort |
| Program thermostat | 10–20 min | Low | Saves up to 10% per year (DOE) |
Times and costs vary by home. Start with the first three or four if you are short on time. You will feel the difference.
A quick checklist: how to winter-proof your house and save money
- Add door sweeps and new gaskets
- Seal door corners
- Film or foam on drafty windows
- Caulk outside joints before hard freeze
- Air seal and add attic insulation
- Clear gutters and extend downspouts
- Shut off and drain hose bibs (use bleeder)
- Set thermostat schedules
- Change furnace filters
- Set indoor humidity modestly (about 30–40% in deep winter)
- Insulate hot water pipes where you can
Use this list each fall. It keeps you on track.
Common mistakes (and how to avoid them)
- Using the wrong caulk in the cold: Many caulks need warmer temps to cure right. Read the label. If cold is coming fast, use a product rated for low temperatures, or plan the work on a mild day.
- Ignoring the hose bib slope: If the faucet body is flat, water can stay trapped and freeze. Re-mount with a slight tilt outward and use a shutoff with a bleeder.
- Skipping attic air sealing: Insulation alone is not enough if big air leaks remain. Seal holes first, then insulate.
- Humidity set too high: In very cold weather, aim lower to avoid wet windows and mold.
- Blocking supply or return vents: Keep them clear so rooms heat evenly.
When to call a pro (and why local help matters)
DIY goes far, but sometimes you need a skilled hand.
- Windows and doors that are old, loose, or foggy: New ENERGY STAR windows and tight, well-sealed doors can raise comfort and cut drafts.
- Siding or trim with rot: Water leaks behind old siding can drive up heat loss and cause damage.
- Big insulation jobs: Air sealing and insulating an attic safely (with proper ventilation and baffles) can be tricky.
- Frozen or burst pipes: A licensed plumber can fix damage and help prevent the next freeze.
Local pros know Wisconsin winters. They know what works in Milwaukee’s freeze-thaw cycles and lake-effect snow.
Need help in Milwaukee?
Tiltin Windows, Doors and More has served Milwaukee area homeowners for more than 25 years. We install windows, doors, and siding that handle real Wisconsin weather. Our team can inspect your home, point out the biggest draft sources, and recommend smart fixes that fit your budget.
Contact Tiltin Windows, Doors and More for a free consultation. We will help you pick the right upgrades so your home stays warm, quiet, and efficient all winter long.
